Tuesday, April 27, 2010

Gone Fishing!


TEACH "Give a person a fish and you feed them for a day. Teach a person to fish and you feed them for a lifetime". (confucius).

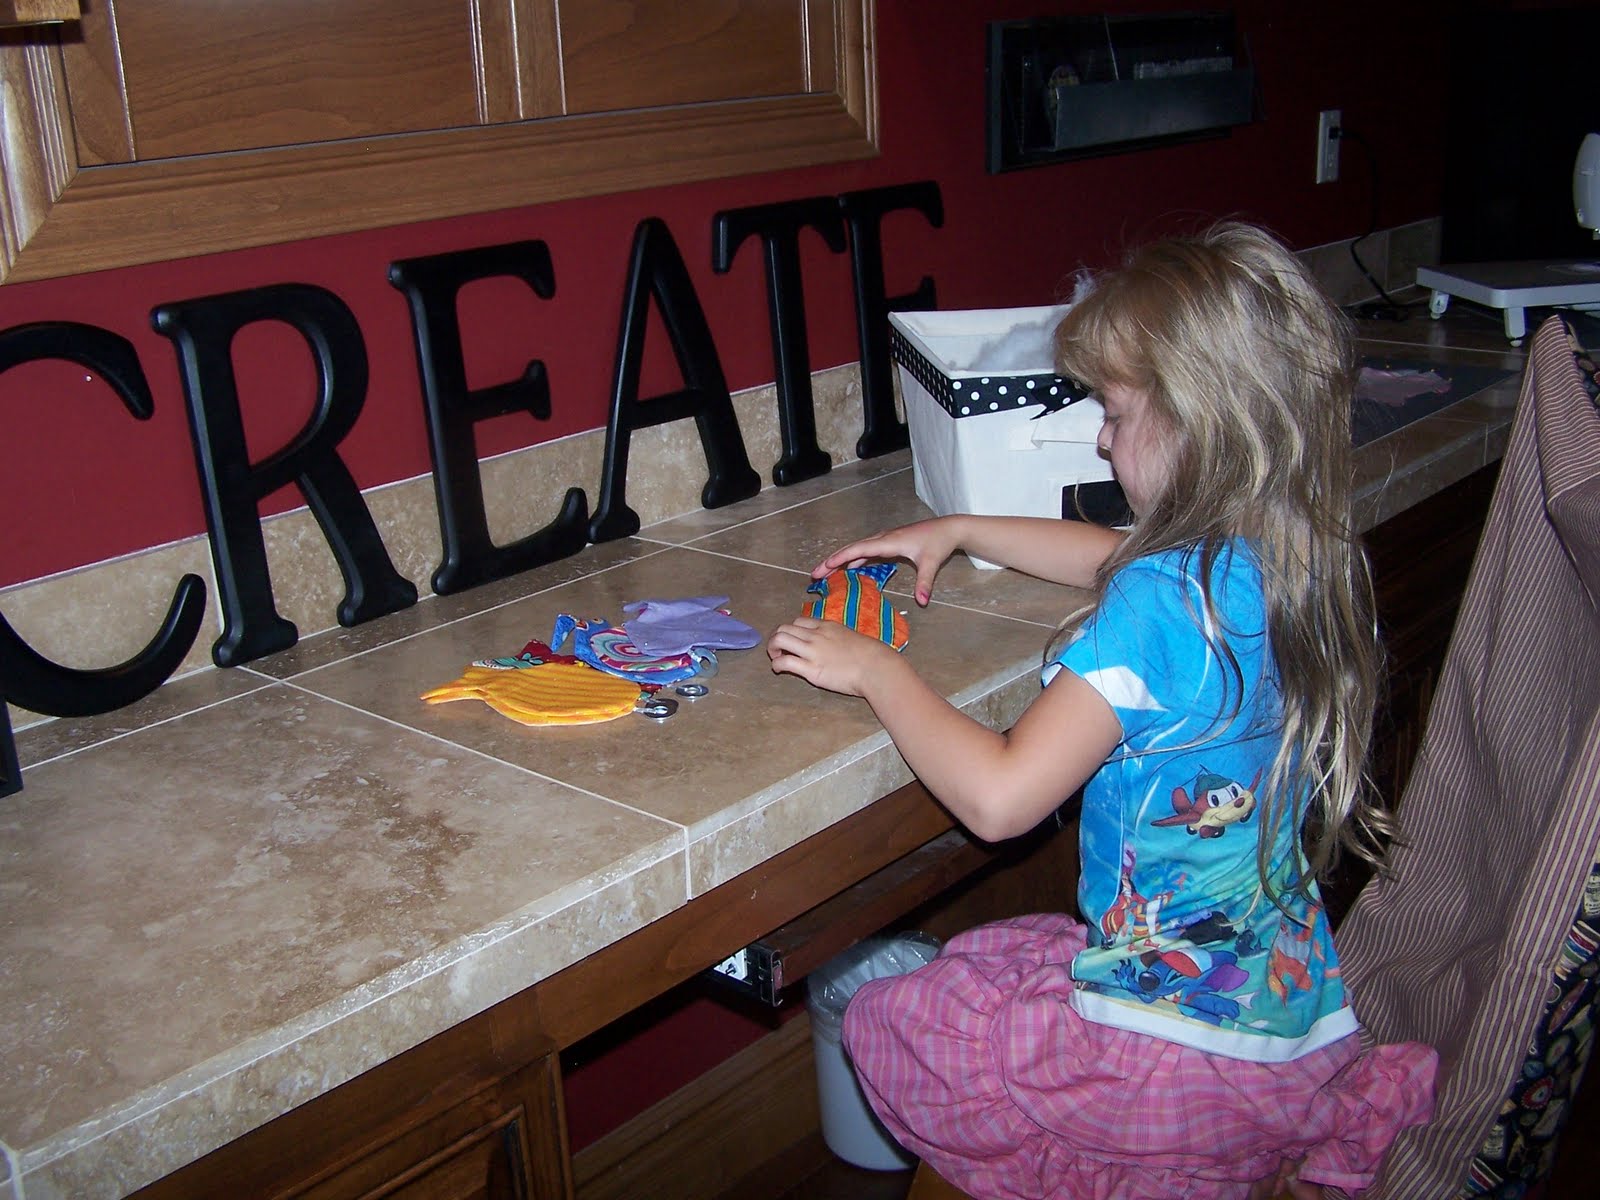
Today, we caught several super groovy fish!

I plan to use thesse fun little fish and fishing poles for my Nursery kids(18 months-3 years). I have to say this is a big thumbs up for entertaining children. Even, my older boys joined in on catching a few fish!
Super easy to make, great use of fabric scraps! A fun project to make with your kids!
We made 12-14 fish with washers that can easily be caught. Here's a simple tutorial.

Let's get started!

Materials:
Scraps of fabrics approx. 6 X 6 depending on the size of fish you desire.
batting/stuffing
washers (you will find all different sizes at Lowes or Home Depot-I like medium size)
round magnets (walmart-craft isle foam sticky tape on back)
dowel sticks (walmart craft isle)
yarn and ribbon

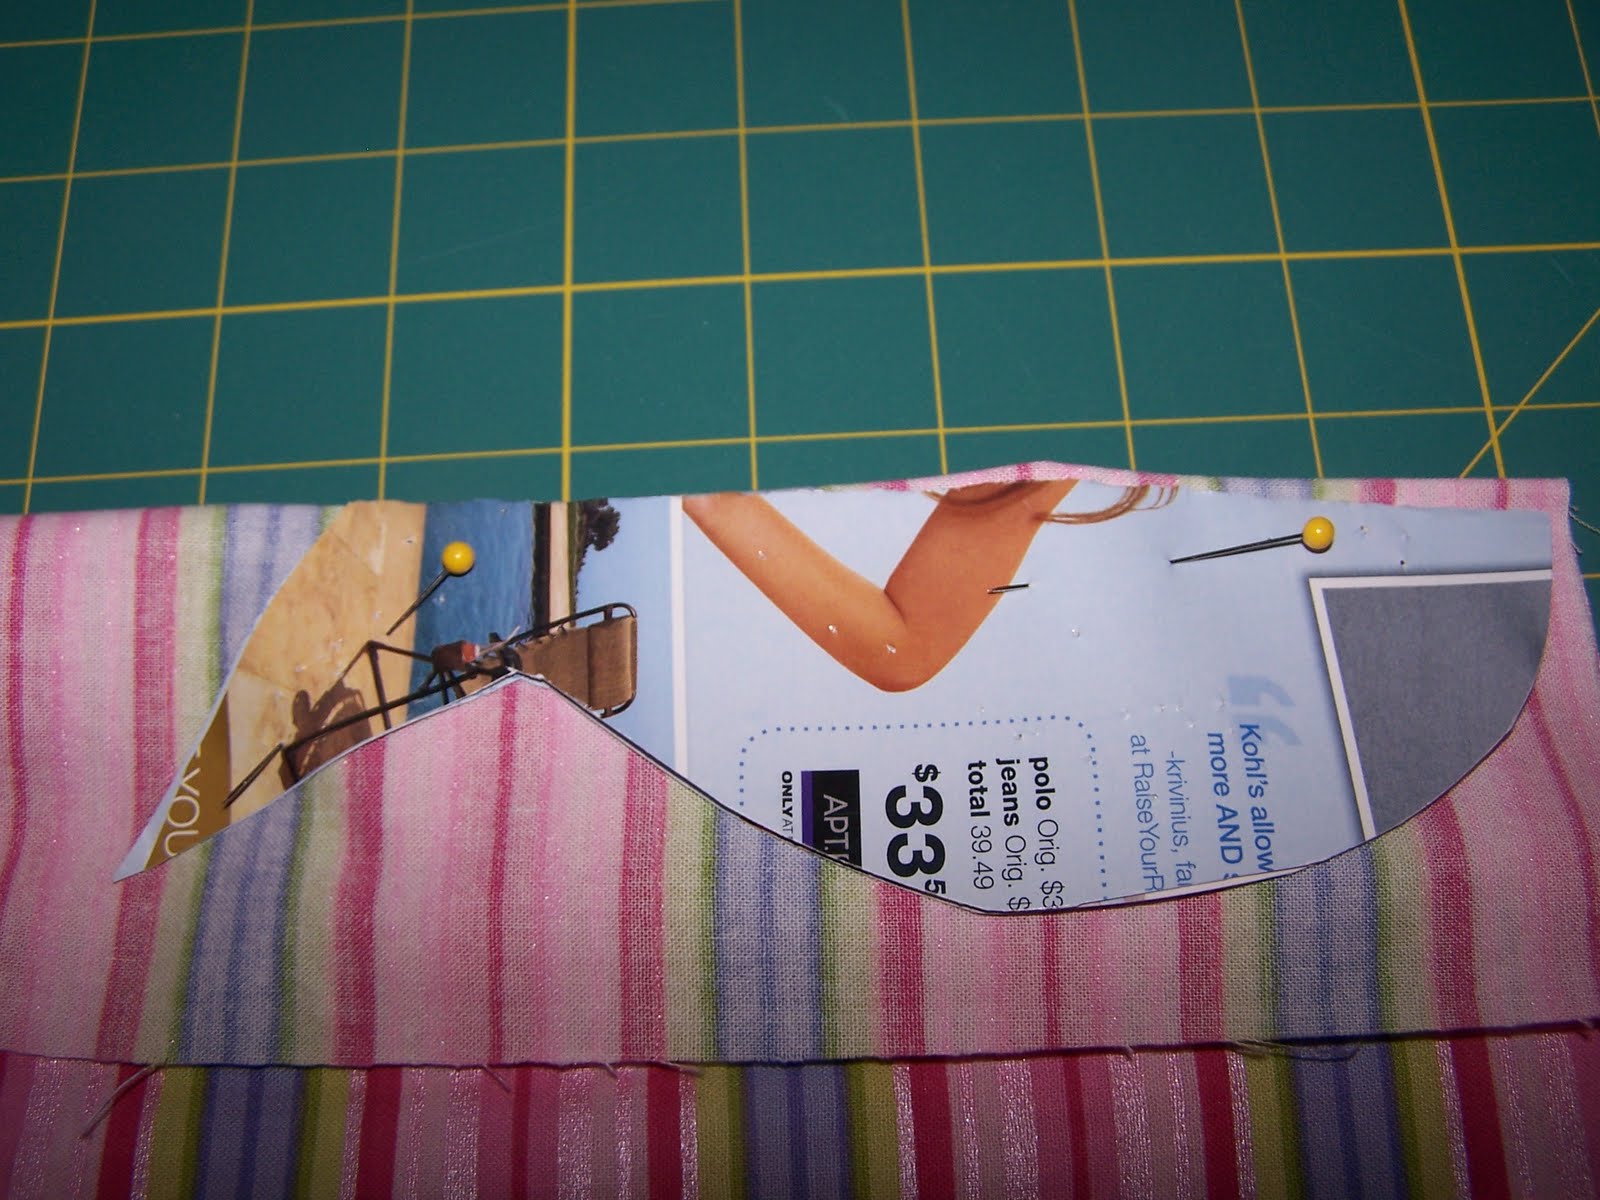
1. Make yourself a fish pattern on heavy card stock paper.
2. Place your fish on the fold of your fabric.
3. Pin and cut


4. place ribbon inside of washer, set aside.
5. place fish right sides together
6. place washer and ribbon between fish,


7. sew completely around fish, reinforce over ribbon/washer.
8. leave small opening for turning.


9. The use of fabrics, patterns and colors are endless.
10. stuff fish
11. sew opening by hand


Fishing Pole:
I tied yarn to the dowel and attached two round sticky magnets between the yarn on each fishing pole. I made several poles so every child in my nursery class will have a pole. I like the dowels at Walmart since they are short-(safer for small kids).

You can also drill a tiny hole in your dowel for the yarn.
Place fish on blue ocean like fabric. Go Fish!
PS. I love Nursery!

Sunday, April 25, 2010

HOORAY FOR TEACHERS!


"PICK ME" and welcome Classroom SMILES with "HOORAY FOR TEACHERS" and "PICK ME" aprons created for your special teacher! You can also coordinate your gift with a Fun and cheerful Reversible Teachers Handbag showing cheers of APPRECIATION!

I found the Teacher apron panels at Jo Ann's Fabrics. The panel gives you an additional 6 X 6 inch square of "Hooray for Teacher" fabric that can be added to a bag or another apron. I have added the extra piece by making it into a pocket and adding it to a handmade teachers bag or you can add it to a denim apron!
You can slip the apron inside your handmade bag and fill with teacher treats!


A big hit with teachers! Cheers to Teachers!
(I am re-posting this post for end of year Teacher ideas. This has been our favorite!)

Tuesday, April 20, 2010

Believe..Miracles Do Happen

Faith Hope and Love are a good thing but the greatest is Love!

In Celebration of my Miracle daughter born 23 years ago--weighing one pound, seven ounces-12 inches long(born at 24 weeks). It is with great honor to sew these little preemie quilts with my daughter and give them to N.I.C.U. Neonatal Nurseries in our community and surrounding areas. My daughter was born at St. Josephs Hospital in Phoenix.
Through those critical days and months of NICU. I wanted to hear and know about tiny babies surviving, it gave me great hope.

I want to share these adorable little quilts with you in hopes you would like to join us! The N.I.C.U. and Mothers of preemie babies enjoy and appreciate receiving these little blankets. The little quilts brighten up the babies environment and gives a loving message of HOPE. You can contact the N.I.C.U. Neonatal Units in your area, they will be thrilled to receive your loving HANDMADE quilts.

My Mother made a tiny quilt(shown above) for my little Brandi along with the tiny p.j.s and knitted booties. We still have the treasured items today, it is a keepsake. My daughter looks at them and understands how tiny she really was!


Here are instructions or guidelines for most N.I.C.U Neonatal Nurseries.

**The tiny quilts work well with two flannel fat quarters(18 X 22) or quilted fabric. The size can vary. It is OK to make them larger, all sizes are graciously accepted, although keep in mind how tiny these little babies are. I like the 18 X 22 size.

Place two fat quarters right sides together, leave a opening for turning and top stitch the edges 1/4 inch around the quilt.

Sew a (X )in the middle to keep fabrics securely in place (about 4-6 inches).

**If you want to add a token of love or dedication to the quilt, do that first. I printed out my "token of love" on appropriate fabric that can be used in a printer.

Do not tie the quilts. Most N.I.C.U. nurseries discourage the yarn ties. (The babies are so tiny that the yarn ties are uncomfortable.)

Make sure your fabrics are clean. Place each quilt in zip lock bags to stay clean and sterile when transporting them to the hospital.


Brandi spent her first six months of life in the N.I.C.U. Brandi has been my greatest teacher in life.

Happy Birthday to my Miracle!

(My daughters footprints)

A journey of A 1000 miles begins with one single step.


Life is Fragile......Everyday is a gift!

Thursday, April 15, 2010

SEW HAPPY!


"Sew Happy" to be finished! Welcome Back! I have completed the sewing room organization mission. The pantry and mudroom are next! Wish me luck there! You can find the dress forms at TaiPan Trading, Quilted Bear, and Hobby Lobby!

Here is the layout of my sewing room/laundry room. I have a small island in the middle that separates the sewing room and laundry room. I use the island for cutting all my fabrics. My favorite corner of the world.


When I designed my Laundry/Sewing Room-I wanted space for my daughters to sew and create along with me. The counter space works well when it is not covered in fabric! My little daughter loves to sit at the counter and do her Kindergarten homework! She usually has her crayons and all her art supplies sitting on the counter.

I made chairs covers in sewing notions fabric. I made my window treatments to match. This is where my colors started for this room!

I've added more baskets and containers. I have taken a lot of my scrap book containers that I don't use anymore-thanks to digital scrap booking and simplicity of project life! I painted the containers black and created cubes for fat quarters, charm packs etc. I've taken the drawers and painted the fronts with chalkboard paint for patterns that I use a lot.


I love unique baskets and fabric lined baskets along with crates! The small bottles work well for all the little stuff like snaps, needles, rotary cutter blades, etc. I found the bottles at The Dollar store last week! The Crates are from Mormon Handicraft from my shopping travels a few years ago when it was temporarily located by the Zoo, my other home(ha ha)!


Do you ever feel like organizing is like putting together a 5000 piece puzzle?


I LOVE these baskets, they are simple and practical! They make look familiar. Yes, they are from Walmart. I added Chalkboard Vinyl fabric for the labels. I can easily change the labels for new fabrics! Of course, I needed a little bit of polka dots to add some cuteness! I love that they are off white and simple, I can use them other places.

The top black basket is for new fabrics or for fabrics that need to be put away-Kind of like papers to be filed!


I am still working on the green baskets in the cupboard. The labels are temporary. I want to do chalkboard paint for labeling. The baskets hold accessories like Velcro, elastic, trims, embellishments, and 1000 other little things.

I have two large drawers for storing ribbon in the same green baskets. I have a few baskets for ribbon scraps that I use a lot! The rolls are organized by color, pattern etc.
Enjoy a Creative and Happy day!

Thanks to Tip Junkie, she is sharing Teacher gifts. Today, she is highlighting a few of my Teacher Appreciation gifts-- created right here in my sewing room!

Cheers to Teachers!